Valet in the sky – Computer Vision with Azure AI

Meet Valet, the first R&D project in the Machine Learning domain 🎉
We built it in just 2 weeks, so Machine Learning is not as scary as it might seem!
Technologies: Azure Static Web App, Azure Custom Vision, React.
What is going on? 🤨

The initial idea was to adopt new cutting-edge Machine Learning approaches to “everyday life” problems. The problem is simple — find occupied and free spaces in the parking lot and automate load measurement.
To address the problem we’ve prepared 2 solutions:
- Cloud-based with Azure AI
- Self-hosted with YOLO
To close the loop, we’ve developed a framework for testing products based on Machine Learning tech. So there will be a series of articles dedicated to Machine Learning. Today we will talk about cloud-based solutions. About Yolo and the testing framework — we'll tell you in a future post!
Computer Vision in the cloud 😶🌫️
Cloud CV solutions are considered easier to use than self-managed services. They’re simple to scale, costs are more predictable — and most importantly major cloud providers offer tools that require zero knowledge in Machine Learning to start.
The downside – there is no control over underlying algorithms and the degree of customization is limited, e.g. they can’t enable polygon shapes for object detection if you need it.
For this PoC, the Cloud solution is more than enough. Cloud Computer Vision tools are usually split into several categories, the most common are image classification and object detection.
Out of the box, they require no setup at all. One can just enable service and then call the API or use SDK to label images. If one wants to use custom labels and detect images based on uncommon patterns they need to dig deeper.
We tried AWS Rekognition with "Custom Labels" and Azure Cognitive Services with “Custom Vision”.
After initial testing we chose Azure Custom Vision for the easy setup, moderate pricing, good out of the box base models and convenient UI. And AWS Rekognition showed significantly less accurate results.
General algorithm for any Computer Vision development:
- Find a dataset!
- Train your model with the dataset!
- Setup detector!
- Profit!
Let's dive into the details!
What is under the hood? 🔞
Quote from Azure documentation:
"The Custom Vision service uses a machine learning algorithm to analyze images. You submit sets of images that have and don't have the visual characteristics you're looking for. Then you label the images with your own custom labels (tags) at the time of submission. The algorithm trains to this data and calculates its own accuracy by testing itself on the same images. Once you've trained your model, you can test, retrain, and eventually use it in your image recognition app to classify images or detect objects. You can also export the model for offline use."
Long story short, no one will tell us this “secret of the company”, welcome to the harsh world of proprietary technologies…
Datasets 💿
The cornerstone of any training and education is the dataset. Just as the books one reads read make them a person, datasets make the models “think”.
Thankfully we are living in the “build in public” era, so you can find a lot of interesting materials on Kaggle and Google Research portals.
🤝 One super sweet part of Kaggle is the community and if you want to start your data science journey, this is the best place to start!
Training 🦾
Now let’s go through it step by step.
- Create a Custom Vision resource in Azure Portal
- Navigate to Custom Vision Web UI, here one can create new projects, label images and test their model with the CV resources they’ve created during the previous step.
- Click the Create Project button and fill in the form. The most important part here is to choose the project type and domain. Since we need to detect multiple objects and their coordinates in a scene we select the Object Detection project type. For the domain we select General [A1]. Domains are used as a base pre-trained model that optimizes the detector for specific types of images. There is no specific domain for our projects, so we will use General. We also selected the [A1] version as it is more suitable for working with more accurate region location needs. More details on choosing the right domain can be found here. Note that there are “compact” options there which can be used for mobile on-device detection.
- Select your project and go to the Training Images tab. On the sidebar you can add custom tags which will be used to detect objects.
- Upload your training images by clicking Add Images. You don’t need to worry about splitting the dataset into training and test images, Azure does this automatically.
- You can start labelling images that will be used to train models. Since Azure has pre-trained models based on the domain of choice in step 3 you don’t have to label thousands of images for the model to start working effectively. The minimum amount for each label is 15 images.
- Click the Train button to start the training process. You can select the type of training from Quick and Advanced strategies. Advanced is more accurate and consumes more time. However since Azure charges for training time per hour, it’s not good for simple iterations, which is where Quick is fine.
- When the training is complete the model is stored as an iteration which you can review in the Performance tab and get info about model (iteration) performance and quality. Three main metrics that Azure uses are Precision, Recall and mAP (mean average precision). Precision is the ratio of valid labels detected / all labels detected, Recall is the ratio of valid labels detected / all valid labels (Azure uses labeled images as reference here). mAP is a generalized metric for overall model quality.
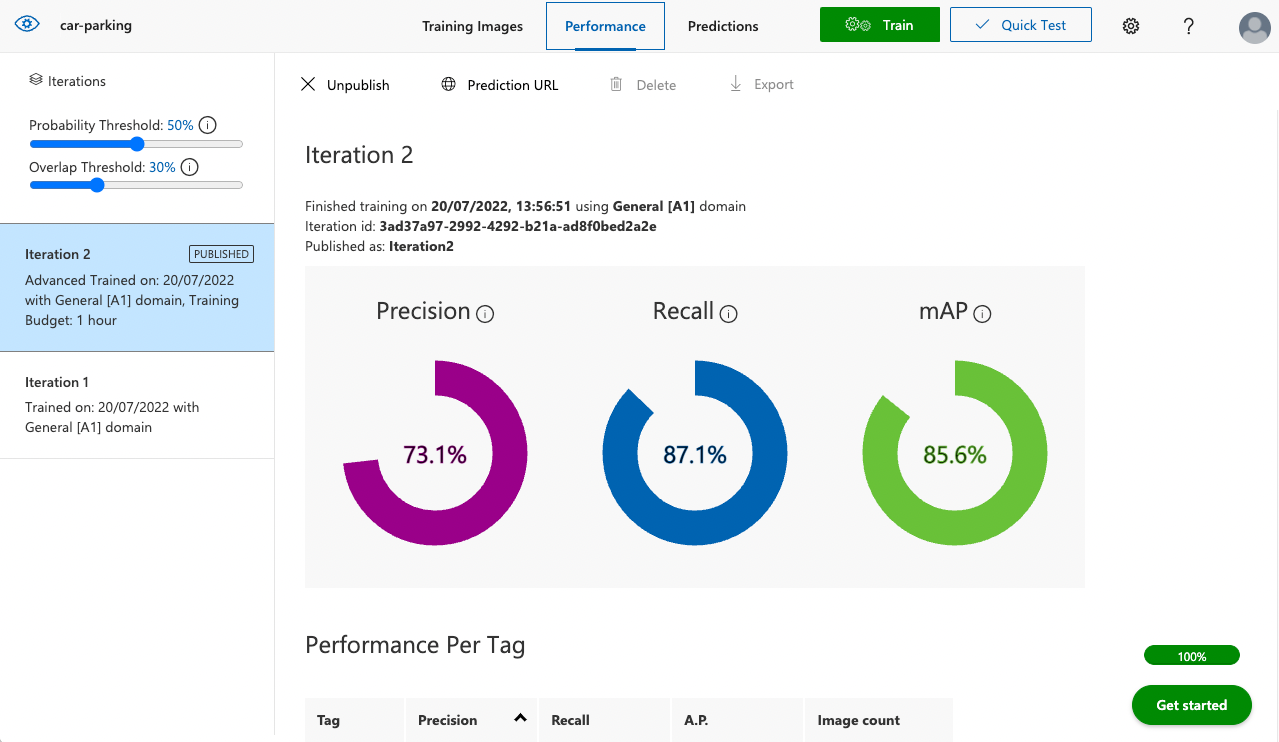
More details can be found here.
Detection 🕵️♂️
When the training is complete you can start using it for the real deal.
Click the Quick Test button to do quick custom validation where you can either upload an image or paste image url to see how the detector works with selected model iteration.
Obviously, all images used for prediction can be found in the Predictions tab where you can add missing labels and save it in the dataset for training new model iterations!
To integrate Computer Vision with your application you can either use its SDK or REST API. To use REST API go to the Performance tab, select iteration and click Publish. Then you click Prediction URL to see request details with endpoint and all required headers.
It should look something like that:
Read more about the request/response format and SDK usage in the docs.
Metrics 📏
Azure does not provide any metrics in terms of speed of inference. Calling API involves network round trip and considering Custom Vision service is run on demand, we assume that there is time to ramp up instance before it’s called after being idle.
To approximate speed we used “created” field from API response and request invocation timestamp to calculate delta. In general hands-on experience the result was around 0.5-1.0 second to respond.
Pricing 💸
The easier it is to use, the more expensive it is.
- Azure Custom Vision bills based on transaction amount ($2.00 USD/1000 transactions)
- Model training hours ($10 USD/hour)
- Image storage ($0.70 USD/1000 images).
It also offers a free tier with non-flexible limits on total projects, transactions, training hours and images stored per month. More up to date information can be found here.
Result 👏
Well, in order not to be graphomaniac smarty-pants, let us share the results of our work!
We built the simplest demo app ever, where one can upload their image or pick from the gallery to check out how it works.
🏡 Grove street, home… Here are the results for our office parking in high definition.
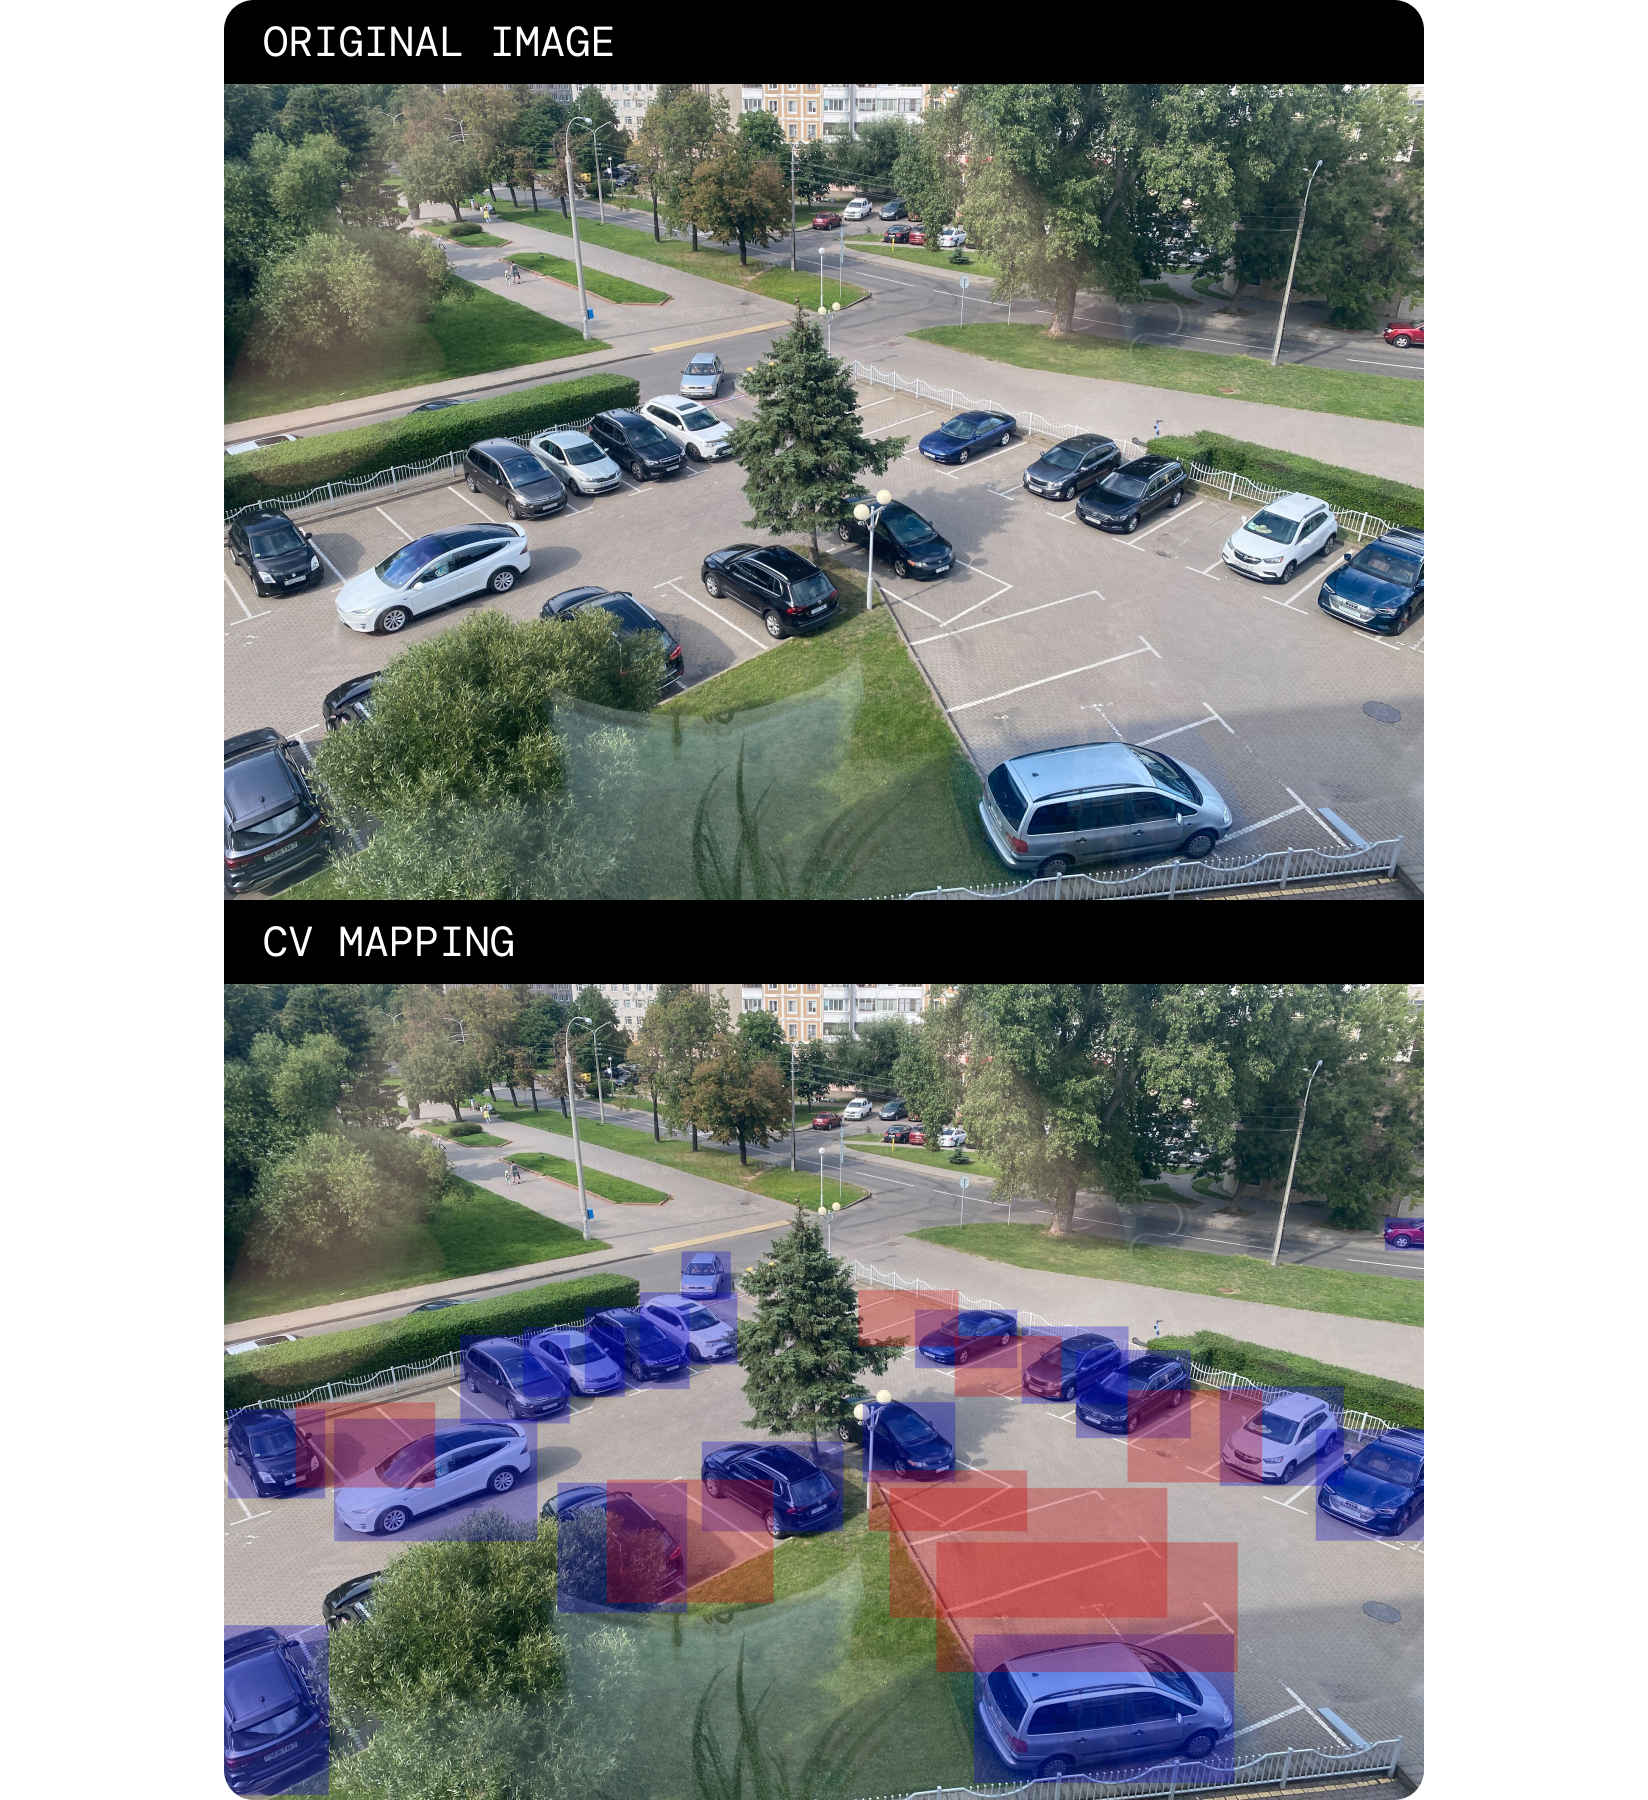
It was just a mind blowing experience. It is especially scary how fast technology is developing, something that a couple of years ago required a Ph.D., now requires 2 cans of beer and a free evening!” – Jaraslau Babich, Full Stack Engineer